P9 Portfolio Project

Portfolio (Scribd.com):


Project Corrections / Time spent: I spent about two and a half hours redoing my P2 Event Ad. The Event Ad was the second project in the class, so my design was very basic. I felt that I could have done a better job, so I dove into the new design. Corrections: new color scheme to connect more with the photo, a big circle instead of several lines, new text for a target audience, and the picture background was taken out. I made these changes to make my ad look more professional. I added better design features to make it look creative as well. The colors were kept dark and neutral to appeal to an older audience. I am pleased with my new Event Ad.

Message: I wanted to show the progress I have made since taking this class. When I first started, I had never even opened PhotoShop or any other Adobe program. I wanted to display my work in a neat, organized, and professional way.

Audience: Future employers or potential clients.

Top Thing Learned: Using the FOCUS skills to create a well-designed project. The principles have guided me in each project. I have learned how to create quality work with creative designs.

Future application of Visual Media: I am going to work in Human Resources, which requires a lot of communication. I could possibly make event fliers, newsletters, or stationary. I have also learned to apply these principles in every-day life. Such as the color wheel to my wardrobe, symmetry and asymmetry to arranging furniture, sketching ideas before jumping into a project, or making parts fit together to make a whole when cooking.

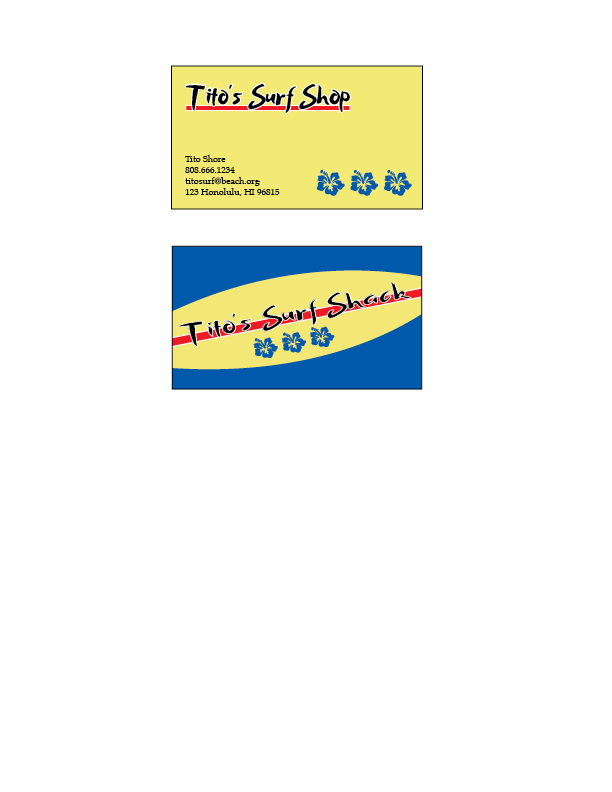
Color scheme and color names: Monochromatic Green

Title Font Name & Category: Apple Spice/ Decorative

Copy Font Name & Category: Source Sans Pro/ sans serif

Thumbnails of Images used: 

bamboo-trees_1920x1080_230-hd dark wood textureBrian Stanfill pic

Sources (Links to images on original websites / with title of site):

HD Wall Paper:

http://www.hd-wallpapers.com/hd/photography/nature/bamboo-trees_1920x1080_230-hd.html

WALL 321:

http://www.wall321.com/Art_Design/Textures/floor_black_dark_wood_textures_2560x1440_wallpaper_85226

Google+

https://plus.google.com/

Project 8: Brochure

Front

P8-BrianStanfill-Front

Inside

P8-BrianStanfill-inside

Inside Panel/Back

P8-Brian-Stanfill-back

 Description: A three folded (duplex) brochure

Process (Programs, Tools, Skills): I started out with the setting up the three folds in InDesign. Opened two documents in InDesign; one for the back and one for the front panels. I made sure to label them first to remember how to print it and fold it. For the design of the project, I based the colors and inspiration on the Mexican flag. I made each section red, green, or white to go along with the colors. I also tried to pick pictures that would go with the theme. I aimed to keep the design simple but to include more pictures so I could showcase the beauty that Mexico itself offers. I used the ruler tool to set the guidelines.

I edited two images in Photoshop to adjust the text-wrapping. First I used the quick selection tool to select the section of the image I wanted to cut out. I then used the ‘refine edges’ section/tool to smooth out the rough or jagged edges. Part of that includes the dialogue box, smooth, feather, shift edge, and contrast. The cutout of the image looked great against the cutout background. I added symmetry and hierarchy by making sure everything was aligned and different sizes.

For the logo, I opened Adobe Illustrator. and used the pen tool to draw the sketch of the eagle. For the neckline, I created circles and added a white stroke. I used the pen tool to draw shapes and adjust them with the selection tool. I made sure everything was aligned by pulling out the rulers and using them as guides.

Programs/Tools Used: Adobe InDesign/ Adobe Illustrator/ Adobe Photoshop.

Message: Mexico is a great place to visit. It has a variety of locations and activities. There are geographical places to visit, great food to eat, and a lively culture.

Audience: Families, couples, or anyone wanting to travel.

Top Thing Learned: Editing a photo to have the text wrap around a certain cut-out.

Color scheme and color names: Complementary: red and green.

Title Font Name and Category: A Papa/ decorative

Copy Font Name and Category: DTL Documenta Sans ST/ Sans Serif   

Word Count: 326

ruins mexico city jarritos3 jarritos2overhead view of two authentic street tacos candles

Dia_de_los_Muertos_Celebration_in_Mission_District_of_San_Francisco,_CA

dancerljarritos1

Sources: (Links to images on original webpages)

http://www.amazon.com/Jarritos-Mandarina-Soft-Drink-12-5/dp/B0000GIVCI

http://wildwildworld.net.ua/fotodnya/780

http://epo.wikitrans.net/Votive_candle

wordoftheweek.barbierintl.com

\https://plus.google.com/+NatashaWisniewski/posts

obrazki.4ever.eu

https://www.foodieforall.com/product/bistec-taco-tortilleria-nixtamal-mexican-food-delivery/

Project 7: Web Page

Project Screenshot:

P7BrianStanfillScreenshot

Description:

A webpage designed to display a logo that I created

Process (Programs, Tools, Skills):

This entire webpage was created using TextWrangler. This was my first time ever using a text editor and doing coding. As I learned the coding for HTML and CSS, I was able to continue adding design and a proper layout. It is important to create a hierarchy to add to the flow. I did this by creating a box behind my text top to make it stand out from the rest. I also bolded certain headings and made an unordered list. I aligned my text with my logo as well.

I first stared with HTML to set up what I like to call the skeleton of the webpage. I set up the layout of the headers, the logo, and the body text. I added my logo and the link to my blog at the bottom. Then I checked my HTML to see if it was valid with http://www.W3.org.

Then I started working in CSS, which adds color and design. I uploaded a photo of the galaxy with a purple tint as the background. I also increased the opacity of my textbox to add a softer feel.

Message:

Madam Medusa can tell your future and read the signs of the cosmos.

Audience:

Anyone interested in learning his or her future or fortune.

Top Thing Learned:

Using CSS and HTML in TextWrangler. I learned how to set up the webpage and add design elements.

Color scheme and color hex(s):

Split Complementary: Purple #623691 and #3E275B; Yellow # F9EC2E; Blue # 4d85d0

Title Font Families & Category:

Wizard of the Moon, Apple Chancery, script; Script

Copy Font Families & Category:

Georgia, modern-style, Helvetica; sans serif

Changes made to the CSS:

I made a note at the top that contained all of my color hex codes. I also added a background and opacity codes. I also changed the text fonts and colors.

Word Count: 421

Project 6: Stationary

Letterhead:

P6Brian Stanfill Stationary Project Letterhead

Business Card (8.5×11 layout):

P6BrianStanfill Business Card

Business Card (Large Layout):

Business card for blog post

Description: 

Creating and matching a letterhead and business card design while using an original logo.

Process (Programs, Tools, Skills): 

I first sketched possible logo ideas with a pencil and paper. After choosing the best one and adding a color scheme, I opened Adobe Illustrator and created the logo. I drew the surfboard using the shape tool. I added a rectangle into the surfboard and added a 1pt white stroke. I added a hibiscus flower with the pencil tool then copied and pasted it. This use of the Rule of Odds and Repetition add to the rhythm of the project. The text I used for the title is called “Beach Resort.” I thought it fit very well with the project. I added text into the red rectangle and made a slight white stroke to emphasize the title. I then tilted the entire object. Once I finished my logo, I opened Adobe Indesign and copied and pasted the logo.

I made my business card next. For that, I created a small rectangle with the shape tool and added a 1pt black stroke to make it look like a business card. I then took my logo and shrank it to fit into the card. I filled the back with blue and added that color to the hibiscus flowers. For the flip side, I added the repeated flowers to the bottom and a red line to underline the text. I then added the name, company phone number, website and address.

For the letterhead, I took the surfboard logo and expanded it to fill most of the page. I rotated it even more to go from corner to corner. I then set the opacity of the image to 5%. I added the surfboard logo to the top left corner and put the company information right underneath it. I made sure to align the logo on the top with the text that was under it.

Message: 

I wanted to portray Tito’s Surf Shop as a relaxed, fun place to buy surf equipment. It is a shop in Hawaii, so I wanted to continue the tropical beach theme. I did this by using bright colors and adding flowers. I want the shop to look like it belongs by the beach.

Audience:

Anyone who is interested in surfing.

Top Thing Learned:

How to create a letterhead with a watermark. I also learned how to create two different pieces of stationary with the same look and feel.

Color scheme and color names:

Primary: Red, Yellow, and Blue

Title Font Name & Category:

Beach Resort: Decorative

Copy Font Name & Category:

Book Antiqua: Oldstyle

Project 5 Logos

BrianStanfillP5Logos

  • Description: Three logo designs for the same company.
  • Process (Programs, Tools, Skills): This project was very interesting because it was done in Adobe Illustrator. I used the pen to to create most of the designs. I first created the hand with the pen tool and changed the fill to yellow and the outline to green. I added the palm lines by using the pen tool as well. For text, I downloaded several different fonts that went with the theme. I used the Arch option to create an arch it the title text. For the eye, I used the shape tool to create an ellipses and i deleted the corners to create an eye shape. I created two different circles and added a start with the same shape tool. For the last design, I used the shape tool to create triangles. This was done by using the star shape but eliminating points so there are only three. I added a sun to the top by adding more points to the star tool. To make the moon, I made a yellow circle and put in a purple circle to have the yellow shaped as a moon.
  • Message: Madam Medusa is a psychic and is skilled in everything to do with the future, palm reading, or magic.
  • Audience: Anyone interested in knowing their future, their luck, or is curious about magic.
  • Top Thing Learned: Drawing shapes and illustrations using the Pen Tool. Also, simplicity in a logo design.
  • Three Color Scheme and Color Names: Top logo: Big Split Complementary: yellow, orange, purple, and green. Middle Logo: Complementary: Purple and Yellow. Last Logo: Tetradic: red, purple, green, yellow.
  • Three sets of Title / Body Font Names & Categories: First title: Magical Dreams (script). Text: Trajanus Roman (san serif). Second title: Wizard of the Moon (script). Text: Lucida Grande(san serif). Third title: Niconne (script). Text: Lucida Grande(san serif).
  • Votes on favorite logo:
  • Top Logo = __2_; Middle Logo = __6_; Bottom Logo = __2_;
  • My favorite logo is the top logo.

Project 4 Montage

BrianStanfill-Montage-Temple

1. I selected a background picture with a hill, a tree, and the sky. I deleted the tree and cropped the image to 8.5×11 inches.

2. After I fixed the background, I selected the image of the LDS San Diego Temple with the Lasso Tool. I dragged it onto my background. I put the Crosshatch filter on the image of the temple. I created a mask layer of the temple image and began to changed the opacity of my brush tool to different degrees between 100 and 30%. I tried to blend the temple in gradually.

3. I put an old-style texture over the temple and background images. This added a softer feel to the images.

4. Next, I inserted a family photograph, again using the Lasso Tool and dragging it in. I focused on blending in my family with the brush tool at different degrees of opacity. I aimed to have a gradual difference in pixels to make it flow. To do this, I had to create a mask layer over the image of my family.

5. I added two different text boxes for each phrase. That way I could easily change font, size, and placement. I made the first text smaller to contrast and emphasize the word “Forever.”

6.I added the Satin Effect to enhance the text. I also made the color of the text the same color as my dad’s suit. This created more of a connection between the text and my images.

7. Programs/Tools Used: Adobe Photoshop.

  • Message: My message is that families can be forever. Another subtle message is that there is life after death. I also wanted to convey the importance of family love and unity.
  • Audience: Families. Everyone has a family and has felt the love of someone close to them. I tried to make the project applicable to people of all ages and all religions even.
  • Top Thing Learned: I learned how to use varying opacity of the brush tool to blend. It takes patience to blend two or more images. I also focused on contrasting fonts to enhance my text.
  • Filter / Colorization used and where it was applied: I applied a Crosshatch filter to the image of the temple. I also added a texture that looked like old parchment over the background image and the image of the temple.
  • Color scheme and color names: Analagous: teal, blue, and indigo.
  • Title Font Name & Category: Palatino Regular- Oldstyle Serif
  • Copy Font Name & Category: Snell Roundhand Regular-  Script
  • Thumbnails of Images used:

hilllight_textured_backroundsd templefamily

Meetup.com: http://www.meetup.com/New-Jersey-Mentally-Disoriented-Group/

Free Wide HD Wallpaper: http://www.freewhd.com/lollipop-and-candy-wallpaper/

Deseret News: http://www.deseretnews.com/top/1833/12/San-Diego-California-Temple-LDS-temple-picture-quiz-Western-US-edition.html

Facebook: https://www.facebook.com/photo.php?fbid=10202800850277031&set=a.4477576452210.2168789.1073943593&type=1&theater

Project 3 Photodesign

P3BrianStanfill

  • Description: This project was meant to demonstrate basic photography and Photoshop skills. The design required color and a poster layout added to the original image.
  • Process (Programs, Tools, Skills, FOCUS principles): The first thing I did was plan my photograph. I like cooking and eating, so I decided to take a picture of food. I set up the scene by arranging the food and trying to add as much light as I could. The photograph was taken with my friend’s T3i Rebel Cannon camera. Next, I opened the image in Photoshop and adjusted the levels, sharpness, saturation, and color balance. I cropped the image to 8.5×11 and started my design. I removed the image’s original background with the Lasso Tool and changed the color to red. I picked the color from the objects in the image by using the Dropping Tool. I added “Monochromatic” into the picture on one of the pasta boxes. I erased the word “Penne” using the Spot Healing Brush. I did the same with adding my color swatches that are right below it. For the title, I used a quote that related to food. The text is white to contrast the red and make it the focal point. I unified the text by putting them on two different lines but close together. To add to the organization of the design, I aligned the text on the bottom with certain letters from the top text. The bottom text is indented a little to create rhythm. The feeling as a whole is warm and inviting, just as I planned.
  • Message: I wanted to send the message that eating with someone is important. Meals shared foster better relationships and make life better. I also wanted to send the message that I know about certain tools in Photoshop.
  • Audience: This project is geared towards many people. I wanted to make something that can be applied to families, friends, roommates, or any significant other. This can also be for college youth looking for a date.
  • Top Thing Learned: I learned that Photoshop is very complicated and difficult. The thing I like the most is the Spot Healing Brush. It is like magic to me because it can erase practically anything. I also learned that the Lasso Tool is good for removing backgrounds and certain shapes. Additionally, I learned that you can change any color with the Selective Color option.
  • Color scheme and color names: I used Monochromatic Red with different shades of red.
  • Title Font Name & Category: Baskerville Bold- Oldstyle
  • Copy Font Name & Category: Snell Roundhand Regular- Script.
  • Thumbnail of original, unedited image inserted
    Use this
  • Date and location you took the photo: February 05, 2015.

P3 Activity: Photography

BrianStanfill-05-Light-Outside
Light 1-Outside
Light 2-Inside
Light 2-Inside
Focus 1- Foreground
Focus 1- Foreground
Focus 2- Background
Focus 2- Background
Composition 1- Thirds
Composition 2-Lead Room
Composition 2- Lead Room

This was the biggest photography project I have ever done and it was great. I was a little stressed at first, but it all came together and I am happy with my first pictures. This was also the first time I worked with Photoshop. For the first picture, I climbed to the top of the BYU-Idaho Stadium. I metered the sky and enhanced the foreground with Photoshop. The sky was very gray, so I added blue and brightened it up. For the inside light, I ventured over to the ceramics lab. I adjusted the brightness on the camera and shot the pots from slightly above. The lighting in the lab was bright enough so I did not have to add a lamp or any other light.

For the foreground and background pictures, I chose a chalked-up doorway. I like the colors and tried to have them as the main focus. I adjusted the focus to first be on the box of Crayons and took my photo. Then I adjusted the focus to be on the door in the background.

The Composition pictures focused on the Rule of Thirds. I found this blue door under the BYU-Idaho Stadium. I lined up the door and the post to each of the horizontal lines of the grid. For the Lead photograph, I took a picture where the subject is looking towards the middle of the picture to lead the eyes into the picture.

All of the photographs were enhanced by Adobe Photoshop. The layers, hue, saturation, color, and clarity were all focuses of the adjustments.

Project 2 Event Ad

P2BrianStanfill-page-001

Description:

A color full-bleed event advertisement to promote a cooking class. This advertisement was created using Microsoft Word and a scanner.

Process (Programs, Tools, Skills, FOCUS principles):

First, I scanned an image of the Saucy Creole Shrimp from a magazine. In Word, I designed a layout that would match the scanned magazine picture. The entire picture was used just as it was scanned. It had rich color and a warm feel to it. I added the title and body text with text boxes. To create the lines at the top and bottom, I drew one straight line and copied and pasted it twice. Then I grouped the three lines and copied and pasted them to put a new set at the bottom. That was done to create repetition within the project. I put the picture in the middle because I wanted it to be the main focal point. The title text was enlarged to also call attention. I picked a color scheme of red and green because it felt warm and spicy. The programs used in the project were Microsoft Word, Cannon Scanner, and a PDF Converter PDF2JPG.net.

Message:

The message was that there was a cooking class that could help people make good food in their own homes. I wanted to relay the message that cooking is a skill that needs to be developed.

Audience:

My audience was people who love to eat good food and want to try to make it themselves. I geared it towards people who like to eat at home.

Color scheme and color names:

Complementary: red and green. These colors are best used together when the shade is varied, which can be seen in this advertisement.

Top Thing Learned:

I learned that Microsoft Word is a powerful designing tool. This was my first experience with the Publishing view and I was shocked at how many editing options there were. This was a great project to be able to discover the abilities and opportunities found it Word.

Title Font Name & Category:

Apple Chancery: Script

Copy Font Name & Category:

Verdana: Sans Serif

Scanned images used, sources, original sizes, location of scanner used:

The original image was scanned from Good Housekeeping Vol. 260 No. 2. 2014. Its original size was 8 and 1/2 inches by 11 inches. I scanned it at 2550 × 3300 pixels, and sized it to with 300 pixels/inch. The scanner I used was a CanoScan LiDE 700F. It is located on the first floor of the McKay Library.

Scan 6

Project 1 Flier

P1Brian Stanfill Final

Description:

Black and White flier to advertise a graduate leadership conference by Vouant Communications.

Process:

The first thing I did was sketch out four different layouts, or formulate a plan. I picked the one I thought was best and developed it more to include more details and better organization. I then created the layout in Adobe InDesign. I created a wave on the top of the flier and filled it with black. For repetition, I copied and pasted the shape and put it at the bottom of the flier. That also gives my flier some rhythm. With the black shapes, I was able to create a hierarchy to show the importance of the title, then the text, and lastly, the logo. To make the title stand out, I made it contrast black shape by using white text. I aligned the logo with the title at the bottom of the flier to create an orderly layout. There is plenty of white space around the image and body text to make things look neat. The image, logo, and text were provided. I corrected some of the grammatical errors and chose and image that drew attention to the focus of the flier.

Message:

I wanted to convey the idea that the conference will help the graduates be more professional and marketable in their search for a job. The message was for them to see that the conference will “get them a cutting edge in business.”

Audience:

I was gearing towards those who have just graduated college. I went for a younger audience about 22-30. I put the waved border to appeal more to younger people, but still look professional.

Top think I learned:

This was the first time that I have ever even opened InDesign so everything was new. It was great to learn the importance of alignment and white space. I did not know what white space was but it made sense as soon as I heard it. Now that I know what it is, look for it, and see where there needs to be more.

Title Font Name and Category:

Avenire: Sans Serif

Copy Font Name and Category:

DTL Documenta Sans ST: Sans Serif

Links to all images used in this project:

1. https://130.commbyui.org/wp-content/uploads/2013/01/VouantLogo2.png

2. https://130.commbyui.org/wp-content/uploads/2013/01/JuliePeterson-Leadership-conference-business-rexburg-Idaho_7576-as-Smart-Object-11.jpg